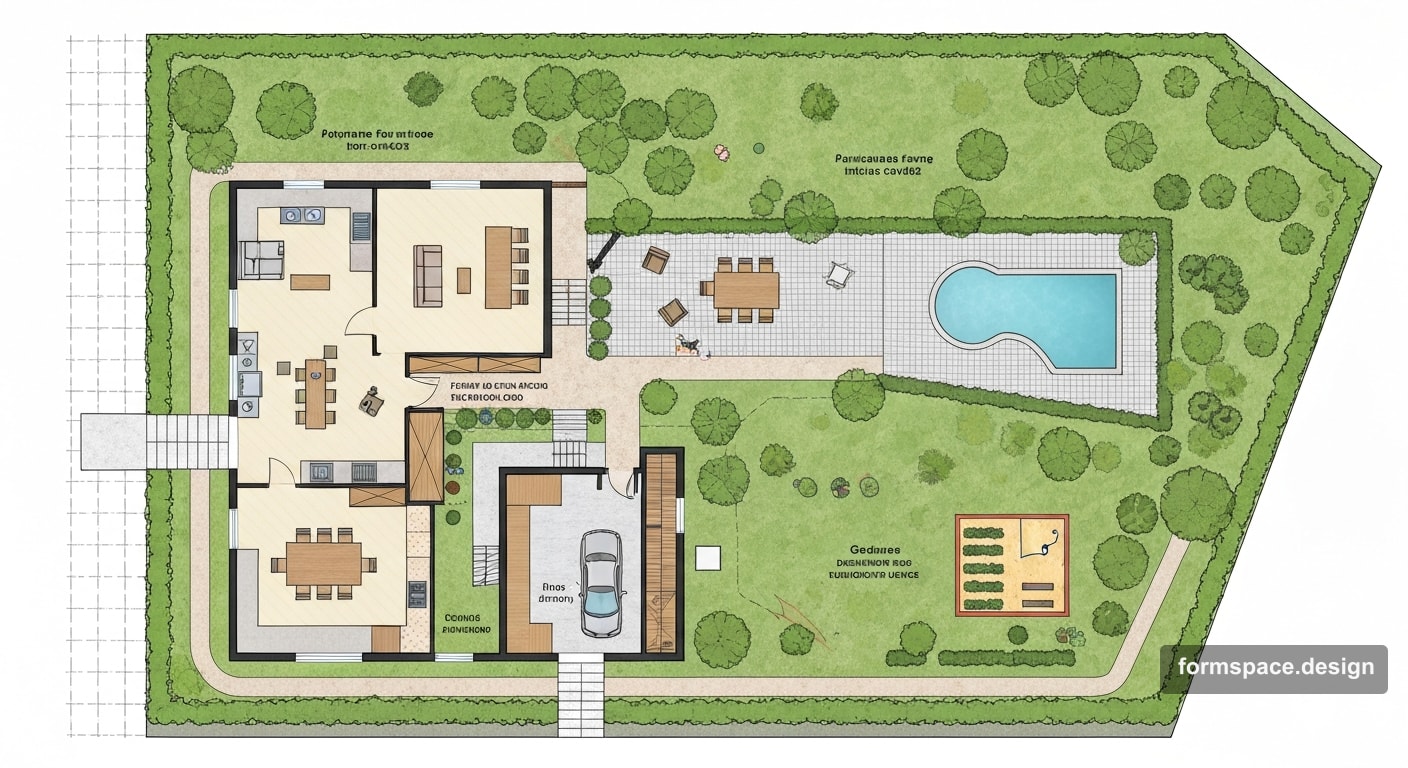
Skizze, Plan und Visualisierung des Grundstücks: Was in jeder Phase gezeigt werden sollte
Wir erklären die Phasen eines Landschaftsprojekts: Skizze, Zonenplan, technischer 2D-Plan und Visualisierung. Was Sie Familie und Auftragnehmer zeigen, damit keine teuren Nacharbeiten entstehen.
Kurze Antwort: Verwirrung im Projekt entsteht, wenn man alles auf einem Blatt gleichzeitig lösen will. Das funktionierende Schema ist einfacher: Skizze -> Zonenplan -> technischer 2D-Plan -> Visualisierung. Jede Phase beantwortet eine eigene Frage und ist für ein eigenes Publikum gedacht. Unten finden Sie eine praktische Matrix: was, wem und wann zeigen.
Dieser Artikel ist der nächste Schritt nach funktionaler Zonierung: erst klären wir Funktionen und Flächenanteile, dann setzen wir das Projekt in der richtigen Reihenfolge zusammen.
Warum Phasen wichtiger sind als eine "schöne Präsentation"
Ein typischer Fehler: sofort ein Rendering erstellen und erst danach versuchen, reale Maße darauf anzupassen. Ergebnis:
- die Erholungszone passt nicht neben den Parkplatz;
- der Auftragnehmer verlangt exakte Maße, vorhanden ist nur ein "Bild";
- die Kostenschätzung schwankt, weil endgültige Flächen fehlen.
Die Aufteilung in Phasen spart Zeit und Geld: zuerst Logik, dann Genauigkeit, dann visuelle Ausarbeitung.
4 Projektphasen: Was passiert in jeder
| Phase | Was wir tun | Zentrales Ergebnis | Für wen |
|---|---|---|---|
| 1. Ideenskizze | 2-3 Varianten der Anordnung | Gesamtkonzept und Nutzungsszenarien | Familie / Auftraggeber |
| 2. Zonenplan | Funktionen und Flächenanteile in % | Klarheit, was wo liegt | Familie + Designer |
| 3. Technischer 2D-Plan | Grenzen, Maße, Objekte, Materialien | Grundlage für Ausführung und Listen | Auftragnehmer |
| 4. Visualisierung | Stil- und Atmosphären-Referenzen | Abstimmung des Erscheinungsbilds | Familie / Auftraggeber |
Phase 1: Skizze (was unbedingt gezeigt werden muss)
Minimum für die Skizze:
- Grundstücksgrenze;
- Haus und Einfahrt;
- 3-5 Funktionszonen;
- 2-3 Varianten der Bewegungslogik.
In dieser Phase nicht nötig:
- exakte Länge jedes Weges;
- endgültige Pflanzensorten;
- ein "perfektes" Rendering.
Ziel: die Richtung festlegen, ohne sich in Details zu verlieren.
Phase 2: Zonenplan (Brücke von der Idee zu den Maßen)
Hier entsteht Struktur:
- Flächenanteile der Zonen in Prozent;
- Hierarchie der Wege (Hauptweg/Nebenwege);
- Konfliktprüfung (Terrasse, Grill, Kinderbereich, Wirtschaftszone).
Wenn diese Phase ausgelassen wird, wird der technische Plan oft zu einer Endlosschleife von Korrekturen.
Phase 3: Technischer 2D-Plan (was der Auftragnehmer braucht)
Das ist die wichtigste Phase für die Umsetzung. Im Plan müssen enthalten sein:
- geschlossene Grundstückskontur mit Fläche;
- Maßstab und Orientierung;
- Wege, Plätze, Rasen und Schlüsselflächen;
- Objektbezeichnungen und Materialien.
Für den Auftragnehmer ist genau diese Ebene entscheidend, nicht nur die Visualisierung. Zum Einstieg im Detail: So zeichnen Sie Ihr Grundstück an einem Abend.
Phase 4: Visualisierung (wann sie sinnvoll ist)
Die Visualisierung prüft Atmosphäre und Stil:
- wie die Terrasse am Abend wirkt;
- wie dicht die Bepflanzung ist;
- ob die gewählte Farbpalette passt.
Sie funktioniert aber nur korrekt, wenn bereits ein 2D-Grundgerüst vorhanden ist. Sonst bleibt es Inspiration ohne belastbare Maße.
Was der Familie zeigen, was dem Auftragnehmer
| Zielgruppe | Zeigen wir | Nicht überladen mit |
|---|---|---|
| Familie | Skizze + Visualisierung + 5-7 Zonen | technischen Tabellen |
| Auftragnehmer | Technischer 2D-Plan + Listen | dekorativen Renderings ohne Maße |
| Materialpartner | Flächen und Längen | frühen Skizzenentwürfen |
So läuft es in formspace.design
| Schritt | Block | Ergebnis |
|---|---|---|
| 1 | 1,1 | Briefing und Anforderungen |
| 2 | 1,3 | Kontur und Maßstab |
| 3 | 1,5 | Zonierung |
| 4 | 1,6 | Technischer Objektplan |
| 5 | 1,7 | Explikation und Flächen |
| 6 | 2,1 / 3,1 | Konzept und Visualisierung |
Diese Reihenfolge löst das Problem "Es gibt ein Bild, aber man kann nicht bauen".
Häufige Fehler in den Phasen
- Visualisierung vor dem Zonenplan erstellen.
- Den Maßstab im technischen Plan auslassen.
- Skizze und Kostenschätzung in einer Datei mischen.
- Mit dem Auftragnehmer nur das Rendering besprechen.
- Materialien der Objekte im Plan nicht festhalten.
Häufige Fragen
Kann man die Skizze überspringen und direkt den Plan erstellen?
Man kann, aber dann gibt es mehr Rücksprünge. Schon 20-30 Minuten für die Skizze sparen später viele Stunden im technischen Plan.
Was ist fürs Budget wichtiger: Visualisierung oder 2D-Plan?
Für das Budget ist der 2D-Plan mit Flächen und Längen entscheidend. Die Visualisierung dient der Erwartungsabstimmung.
Braucht man einen separaten Designer und einen separaten Visualisierer?
Nicht zwingend. Wichtig ist, dass Plan und Visualisierung auf demselben Grundstücksmodell basieren.
Fazit
Die richtige Reihenfolge ist einfach: Idee -> Zonen -> technischer Plan -> Visualisierung. So stimmt die Familie das Konzept schneller ab, und der Auftragnehmer erhält ein messbares Dokument ohne Vermutungen.
Nächster Schritt: AutoCAD, SketchUp oder Online-Planer - was wählen.
Veröffentlicht:

Volodymyr Vybornyi
Landschaftsdesigner, Gründer von https://formspace.design/
Schreibt über Landschaftsdesign, Business und moderne computergestützte Planungswerkzeuge für Landschaften – einschließlich KI.